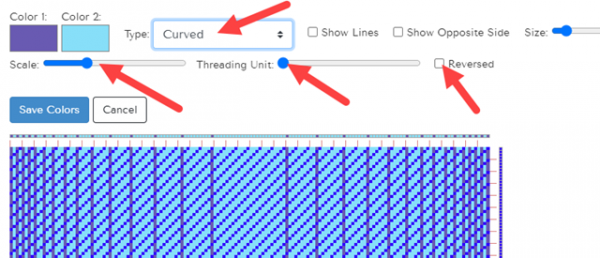
Curved Gradient
Curved gradients are called that because they create the illusion of a curve. When Color 1 is a dark color and Color 2 is a light color, the gradient gives the illusion of a curved cylinder, with the cylinder rising out of the two-dimensional cloth. You can control the “height” of the cylinder using the Scale slider.
When you select the Curved gradient the drop-down list, these options become available:
You can see that your Gradient is already happening in the draft. From this point, you can change colors as described above, or play with how the gradient works.
Changing Scale
Scale changes the rate of change in the gradient – slow vs. quick change. Here’s the pattern with the scale increased:
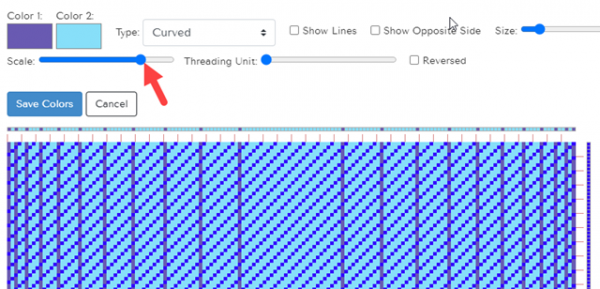
At a larger scale, the rate of change is slower than the smaller scale shown in the first Scale image. As the scale gets smaller, the curve appears shallower, and the curved area appears smaller. Eventually, when the scale gets really small, the curve flattens out and the fabric appears almost flat again as shown in the first image.
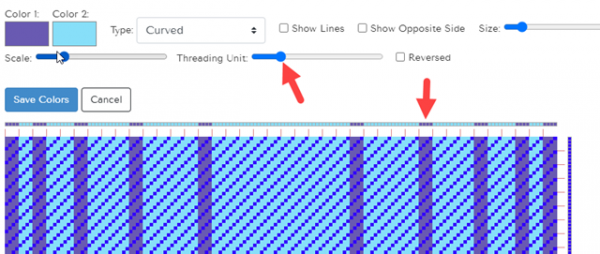
Changing the Threading Unit
Threading Unit is the number of threads in each group. At the lowest Threading Unit size, each colored “stripe” in the gradient is a single thread wide. As the Threading Unit size increases, each stripe becomes a multiple of the Threading Unit size in width. So at a Threading Unit size of two, every stripe is a multiple of two threads in width (2,4,6,8, etc.), at a Threading Unit size of three, every stripe is a multiple of three threads in width (3,6,9, etc.), and so on.
The Threading Unit size can’t be set directly but is easy to see by counting the number of threads in the narrowest stripes. In the image below, the threading unit (seen in Color 1) is four.
Show Opposite Side
Show Opposite Side does just that. In twills or complex drafts, it’s always a good idea to look at the other side of the fabric.

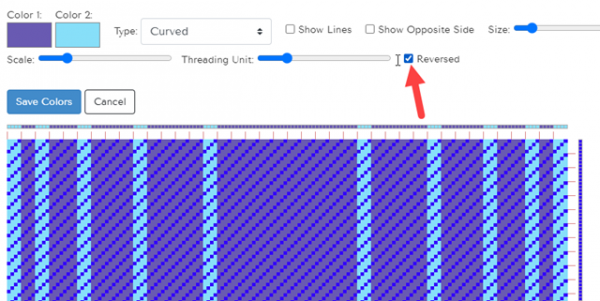
“Reversed” Check Box
Reversed changes the order in which Color 1 and Color 2 appear from start to finish. Notice now that the warp begins with the light blue:
When you’re happy with your gradient, click the Save Colors button to return to the regular Color Editor window, where your gradient is now loaded and ready for you to save or change as you like.